
- Go to ADSCore
- Made in Italy

- Custom Apparel
- Most Popular
- Sublimation Ready
- $1.99 T-Shirts
- $4.99 Sweatshirts
- $5.99 Hoodies
- Track Order
Follow Us:


 All
All
 Go to Gildan
 Go to Richardson
 Go to Afton
 Go to Bella + Canvas
 Click Here To Shop
 Go to Comfort Colors
 View All
 Go to Next Level
 Go to Rabbit Skins
 Go to Jerzees
 Go to Hanes
 Go to Yupoong
 Go to Shakawear
 Go to Otto Cap
 Go to Port & Company
 Go to ADSCore
 Go for District
 Go for Sport Tek
 Go for Port Authority
 Go for dtfx
 Go to ADSCoreMade in
Posted by AllDayShirts on to Printing Techniques.
Did you know that 69% of entrepreneurs in the United States start their businesses at home? One business idea that is easy to do from the comfort of your living room is making custom mugs.
If you're creative with the skills of a graphic designer, this is a great path to go down. Not sure how to print on ceramic mugs? Keep reading to learn how.
Knowing how to make a custom mug involves creating the perfect design. This design should be created on a computer using reputable photo editing software.
You'll need to plan out some important details like the size of the ceramic mug and how many colors you want to use. Too much color can end in a real messy design so use colors wisely.
Any mug design should be memorable so think out of the box with your creation. Although including the business name and logo is important, you can always add more pizazz.
To ensure you make the intended sales, cater to the needs and wants of your target audience.
Sublimation is a great process for printing a custom mug because it creates a lasting outcome. Custom mugs aren't going to sell if they aren't dishwasher and microwave safe, sublimation can make this happen.
Sublimation custom mugs created with dye-sub ink can penetrate the surface of ceramics because they are specially coated.
Along with the ceramic mug, you'll need some equipment and supplies on hand. The following materials are must-haves for the process:
You might have some of these items already. For the items you don't have, you'll need to purchase before learning how to print on ceramic mugs.
The last supply you'll need is the mug itself. You can purchase ceramic sublimation mugs in bulk to create more products for your business.
Most businesses prefer to have a white polyester coating ceramic mug to make their designs pop. However, other colors are available. Whatever you choose, always purchase mugs made specifically for sublimation printing.
After gaining access to all of the necessary materials, you'll be ready to print your own mug designs! These seven steps are all it takes to bring your ideas to life.
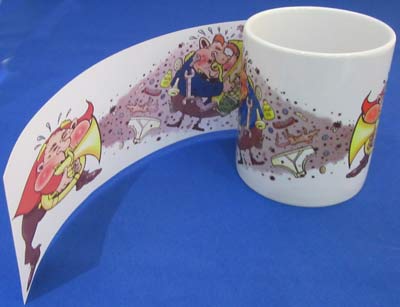
Source: Procartoon.com
The first step of any printing process is to choose the design or image that you want to use.
You'll have options for different programs such as Creative Studio, Photoshop, Adobe Illustrator, or CorelDRAW.
If you choose, you can find a mug template online to test out the printing process before using your own designs.
Typically, mugs are 11oz, so you'll need to accurately size your graphic. An 11oz mug is 3x9 inches.
It is important to purchase mugs made for sublimation printing. These are already coated in a factory. You won't be able to coat them yourself.
It is recommended to print mugs away from the top and bottom edges because some sublimate ceramic mugs are tapered.
When you are ready to print your chosen design, you'll need to use full-size transfer paper or used a paper designed for common mug sizes.
You'll also need to check the printer settings to ensure they will work for your customized mugs. Check the "mirror image" box for one and then pick your resolution.
To avoid wasting ink, use 300 DPI resolution or less. This will also lessen the time that the graphic takes to print.
If you haven't already done so, load your printer up with sublimation inks. Always print on the coated side of the sublimation transfer paper.
After you've double-checked everything in this step, you're ready to print the graphic!
With your scissors, trim your transfer paper so the image size is a bit smaller than the top and bottom of the mug. Face the image towards the mug and wrap the paper around it.
Press the paper firmly to the mug and secure it with heat-resistant tape.
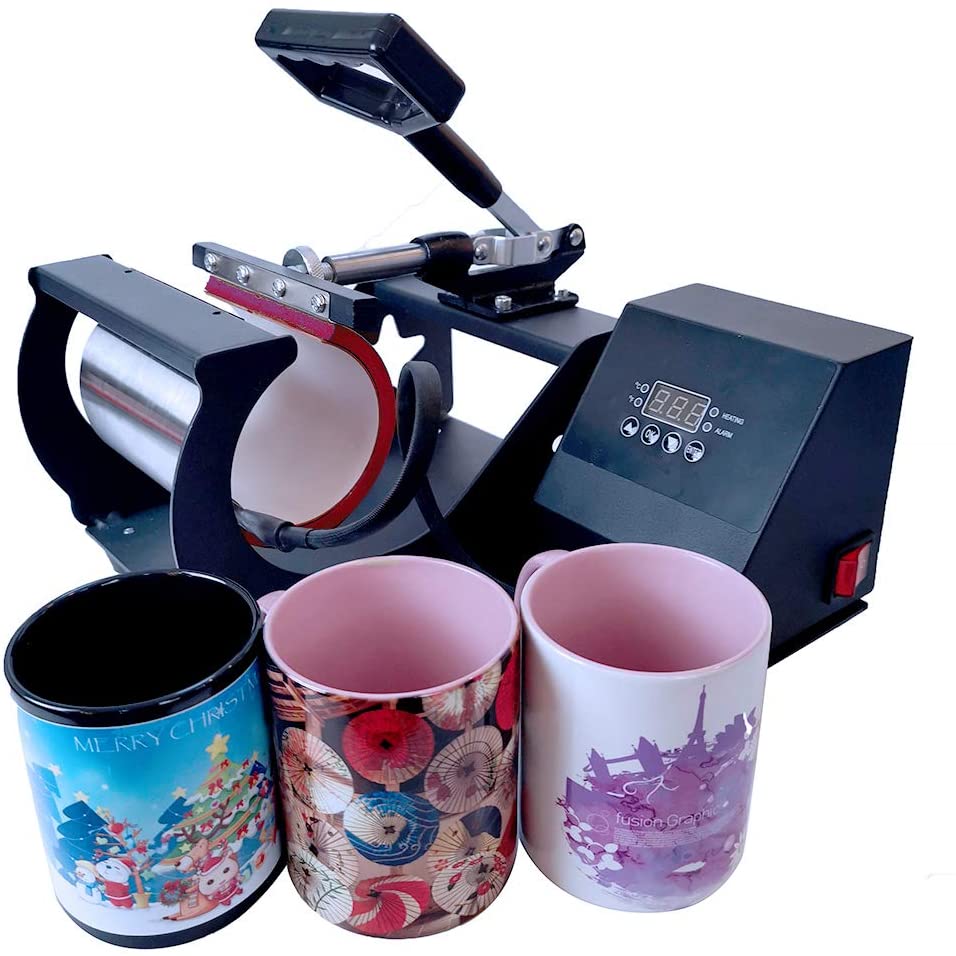
Now, you'll learn how to sublimate ceramic mugs! Prepare your mug press by setting it at 400°F. The pressure should be adjusted to medium-heavy.
The time you'll need to set will depend on the manufacturer of the heat press and mug manufacturer. Generally, it will be anywhere between 4 and 6 minutes.
You might have to experiment with the timer the first time around which is where the design templates will come in handy.
Once your mug press has had time to heat up to the correct temperature, place the mug inside without messing up the transfer paper. Any slight movement in the paper can ruin the final result.
Ensure that the press is snapped closed to let the sublimation process begin.
After the time is up, use your heat-resistant oven mitt to remove the mug from the heat press. Remove the transfer paper using a small knife or tweezers. If you try to remove the paper with your bare hands, you might burn yourself.
You can set the mug aside to let it cool or use a low-speed fan to speed up the cooling process. You'll know the sublimation process is complete when the mug is no longer hot to the touch.
There are alternative methods for sublimation without using a heat press. Although using a mug press is often the best method, not everyone has the ability to buy one.
The two methods below, oven baking and using a heat gun, work best with infusible ink instead of dye sublimation ink. You'll also need infusible ink transfer sheets to hold the design together when placing it on the mug.
Under high temperatures, infusible ink turns into gas to infuse into the mug. Be careful when using infusible ink. Like any craft, this ink is easy to mess up.
Using the right kind of infusible ink works on sublimation-specific mugs because they are treated with a special coating. The ink absorbs into the coating instead of sitting on the surface of the mug.
When you use infusible ink, your customers can use their mugs and clean them safely in the dishwasher. You don't need a mug press to transfer the ink, as baking these mugs in the oven at a hot enough temperature works.
However, there are concerns about baking these mugs with ink on them and then using the oven for regular cooking later. To combat this issue, you can transfer the ink using a toaster oven dedicated to crafts only.
Using the same sublimation process, you can transfer infusible ink on a mug using a heat gun. Run a heat gun evenly over the ink sheet for about four minutes.
Even during this process, the mug will get very hot, so let it cool for around 20 minutes.
The heat gun method works best for images that don't take up the entire mug. For a complete wrap design, it is best to use a mug press.
Perhaps the easiest method to create custom mugs is spray-painting them. Yet, it is highly technical and requires a lot of skill.
To set up, you'll need to create a spray station and purchase the different spray colors you need. For this option, you'll want to use a stencil to avoid the paint from spreading to unwanted areas.
You'll need a ceramic mug for this process just as you would for sublimation. Although the initial investment is less, the designs fade over time and the painting process can get messy.
If your business mugs are merely for decoration, you won't need to seal the paint. If you want your customers to be able to use it and safely wash it, place the mug in a 300°F oven for 30 minutes.
Because mugs are small, spray painting is difficult to do with complicated designs. Instead of spray paint, you can opt for acrylic paint which is easier to control on small merchandise.
The best tip we can provide on printing custom ceramic mugs is to keep the design away from the edges. Although we already mentioned this, it is essential to emphasize the importance.
Not only is there usually a taper on the top and bottom of the mugs, but the heat press can also be weaker at the edges. To avoid a poor transfer of the graphic, make your image slightly smaller than the mug itself.
Another trick we want to mention is how to preheat mugs before placing the image on them and putting them in the mug press. You can preheat the blank mug inside the press for up to 40 seconds.
You can also keep boiling water in the blank mug for up to two minutes or soak mugs in a bowl of hot water for at least 5 minutes or up to 10 minutes.
If you choose the latter method, wipe the mug dry before placing it in the mug press. The key is to get the mugs warm but not hot enough to keep you from handling them.
Now that you know how to print on ceramic mugs, you can successfully create custom designs for your business. Sublimation printing is a high-quality method that lasts and provides amazing results.
Get creative with your ideas to help your business boom. Check out our discounts and offers now to search for the tools you need.
Please email media@alldayshirts.com