
- Go to ADSCore
- Made in Italy

- Clearance
- Custom Apparel
- Most Popular
- Sublimation Ready
- $1.89 T-Shirts
- $5.99 Hoodies
- Track Order
Follow Us:


 All
All
 Go to Gildan
 Go to Comfort Colors
 Go to Afton
 Click Here To Shop
 Go to ADSCore
 View All
 Go to Bella + Canvas
 Go to Jerzees
 Go to Otto Cap
 Go to Richardson
 Go to Next Level
 Go to Rabbit Skins
 Go to Shakawear
 Go for dtfx
 Go to Yupoong
 Go to Independent Trading
 Go to Hanes
 Go to Port & Company
 Go for District
 Go for Sport Tek
 Go for Port Authority
 Go for Burnside
 Go to ADSCoreMade in
First, you might be wondering exactly what a Cricut is, and how it can be useful in your quest to make T-Shirts.
If you have any questions, feel free to pop over to our blog article about the Cricut 3.
If you have successfully purchased a Cricut and want to know how to make T-shirts with it, this article will walk you through the process step by step.
There are many reasons why someone might want to make custom T-Shirts at home. For example, maybe you want to create matching T-shits for an event, like a family reunion, or for you and your fellow employees.
The office Christmas party goes great with themed company t-shirts! On the other hand, you might be beginning your own small business!
Whatever the case may be, if you have a Cricut, some plain t-shirts in bulk, and a bit of creativity, you have (almost) everything you need to start making T-shirts at home. Now follow along as We guide you step by step towards your custom T-shirt goals!
Before we dive into the process of making a custom tee, let’s make sure you have all the necessary components needed to properly start you on your journey.
For this project, we’ll be making heat transfer vinyl designs. The supplies you’ll need to gather include:
One of the most important selections regarding gathering supplies is the T-shirt you are choosing to print on.
For heat transfer vinyl, We suggest to used shirts that are 100% cotton. Some of our best-selling 100% cotton T-shirts are the G500 (unisex), the G500L (for women), and the G500B (for children). Our website has a multitude of colors to choose from, ranging from white to even safety green! On top of that, our stock runs deep, meaning we’ll have almost anything you need ranging from extra small to 5XL!
Once you have everything you need set up and ready to roll, it's time to embark on your journey!
Open your Cricut Design Space software. Once it loads, click on “New Project” and then choose “Templates” in the upper left corner. Select the “Classic T-Shirt” template and then choose the appropriate options for style, size, and color. Whether you’re working with an adult or kids’ plain t-shirts, using this template helps to ensure that your set-up will be perfect and proper!
If you just want to use one of the designs given by the software, go over to “Images” and then scroll through the library until you find something you like. This is a good idea for beginners who are just starting their journey.
The best practice is to begin with a simple design that doesn’t have a lot of detail. If you have some experience working with vinyl and are comfortable with weeding intricate designs, feel free to choose something more complex or create your own design from scratch.
Once you’ve chosen your design, it will display on your shirt template. If necessary, resize the design to fit the shirt properly using the resize handle which is located in the bottom right corner. Click on the handle and drag to resize the image.
If you are not choosing a design, and instead are creating one, it is imperative to use the Cricut Design Space. This software makes it easy to formulate new designs that can be used on your Cricut.
Feel free to play around with the design software and get a really good grasp of its abilities. This software will be a valuable tool to you throughout your journey so it is important that you are very familiar with its multiple bells and whistles.
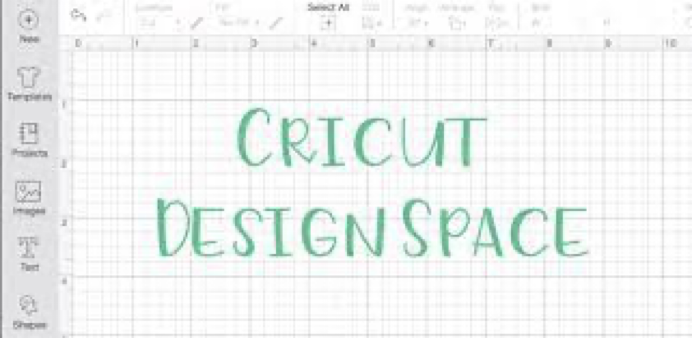
Source: Cricut.com
When everything looks good on your design, click on the green “Make It” button. Then, on the left side of your screen, toggle the “Mirror” option. When cutting heat transfer vinyl, images always need to be mirrored.
Place your heat transfer vinyl on the cutting mat with the shiny side facing down. This is extremely important. Then, load the cutting mat into your machine, choose the appropriate settings and cut out the design.
Now that it has finished cutting, it’s time to weed, which is simply the process of removing all of the excess vinyl you don’t want to be transferred to your t-shirt.
Start by peeling away the vinyl from the edge. Take your time to avoid peeling up any vinyl you do want to transfer to your shirt. Use weeding tools to remove all the extra little bits and pieces.
Be patient and take as much time as necessary to fully weed the design. If you choose a simple image, this shouldn’t take long.
Before the transfer begins, it is important to make sure that the T-shirt is pre-pressed. If you transfer the design over when the shirt has wrinkles or moisture, it can ruin the entire shirt!
Once you are finished with ironing out the wrinkles, make sure that the design is placed exactly where you want on the shirt. Poor, unaligned placement will result in a ruined shirt.

Source: StickerYou.com
After you are satisfied with the image placement, apply medium pressure with your iron or heat press. Check the directions that came with your heat transfer vinyl and/or your heat press for full instructions regarding how long to apply heat.
Wait a few moments for the design to cool down to a warm temperature and then carefully pull the carrier sheet off the image. If the design starts to peel up, replace the carrier sheet and press again.
With Cricut, designing custom apparel is easy. Follow the steps listed above and you’ll be on your way to creating unique shirts to wear, dress your family in, give as gifts, or even sell.
We hope that you fall in love with your Cricut and that you use our cheap and reliable products to help make the most out of your new toy.
If you would like to look around at our store's products, feel free to check out our website here.
Please email media@alldayshirts.com
