
- Go to ADSCore
- Made in Italy

- Clearance
- Custom Apparel
- Most Popular
- Sublimation Ready
- $1.89 T-Shirts
- $5.99 Hoodies
- Track Order
Follow Us:


 All
All
 Go to Gildan
 Go to Richardson
 Go to Afton
 Go to Bella + Canvas
 Click Here To Shop
 Go to Comfort Colors
 View All
 Go to Next Level
 Go to Rabbit Skins
 Go to Jerzees
 Go to Hanes
 Go to Yupoong
 Go to Shakawear
 Go to Otto Cap
 Go to Port & Company
 Go to ADSCore
 Go for District
 Go for Sport Tek
 Go for Port Authority
 Go for dtfx
 Go to ADSCoreMade in
Tie dye hoodies and shirts are the perfect way to express your individuality and unique style. But instead of using bright swirls and colorful patterns have you ever thought of using bleach?
Bleach tie dye or reverse tie dye is a creative twist on a centuries-old art. It is the perfect way to pass a weekend afternoon or give your tie dye shirt business a new edge.
If you are wondering how to tie dye with bleach, look no further. This article will tell you everything you need to know to create custom bleach tie dye hoodies and t-shirts.
Before you gather your supplies and get bleaching, it is important to note that reverse tie dye uses caustic chemicals. You should always wear gloves while handling bleach and avoid doing this activity with or around small children.
If you have tie dyed shirts before then you probably have some old supplies lying around your house. To get started with your bleach tie dye you will need the following:
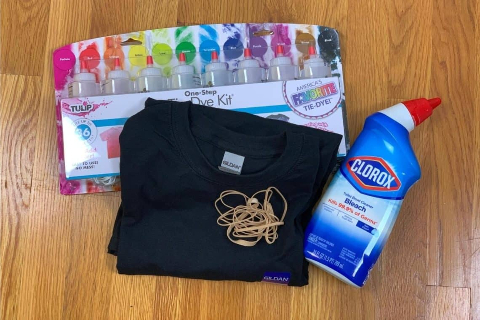
Source: chaoticallyyours.com
When learning how to bleach tie dye, it is best to start simple. Try using a black cotton t-shirt before moving on to other color options.
For the fun extras described later in this article, you will also need a spray bottle and colored tie dye kit.
With traditional tie dye, you can start with a damp or dry shirt. Damp cloth allows the color to bleed deeper, while dry shirts limit the penetration of the dye. However, bleach tie dye should always be done with a dry shirt.
For the frequently used spiral pattern, pinch the fabric to create the center of the spiral Then slowly twist until all the cloth is wound into a tight circle. Secure this using rubber bands and you're ready for bleaching.
Try different methods of folding, rolling, and twisting to create your own unique bleach tie dye design. Or leave your cotton t-shirt as is to try the alternative method listed in the next step.
Before breaking out the bleach make sure to change into something you don't mind ruining.
It is best to do bleach tie dyeing outside or in a bathtub or sink. Avoid fabric drop cloths and do not work around rugs, carpet, or wooden surfaces, as they could get damaged.
If using a bathroom cleaner bleach, use it straight from the bottle. Otherwise, mix one-part bleach with three parts water in your squeeze bottle. Put on gloves and begin pouring bleach over your prepped t-shirt.
The more bleach you add to your shirt, the less color will remain. Once you are finished, leave bleach to sit for 10 to 30 minutes. Anything longer could damage the shirt.
How to Tie Dye Shirts Alternative Method
Instead of folding or rolling your shirt spread it out flat on your workstation. Pour bleach into a spray bottle and spray it onto the shirt. You can center the spray in one location or do little bursts all over.
Careful not to overdo the bleach as you risk ending up with a plain white shirt. This method can also be done with traditional tie dyeing. However, it is best to wet the shirt first to enhancing color blending.
Do not use a washing machine to remove the bleach, as this could ruin the effect. Instead, put your gloves back on and rinse thoroughly in a sink or bathtub. Add a bit of laundry detergent, give it a good wash, a second rinse, and there you have it.
You might be satisfied with your bleach tie dye shirt as is. Or, perhaps you want to take it to the next level with one of these great ideas.
Adding Color:
If you used a black shirt for your bleach tie dye, then you might want to add a splash of color to the new white spaces. Get your shirt damp and lay it out on your tarp or covered surface.
Follow the directions on a regular tie dye kit or box dye. Then apply the dye to the bleached areas of your shirt. You can experiment with one color or several complimentary colors.
This addition is best done on a black reverse tie dye shirt. Lighter-colored shirts will end up showing the dye all over rather than just the bleached parts.
Bleach Designs:
Add additional designs, symbols, or words to the darker portions of your cotton shirt with a bleach pen. Make sure your shirt is dry and place a plastic bag in between the layers to avoid bleed over.
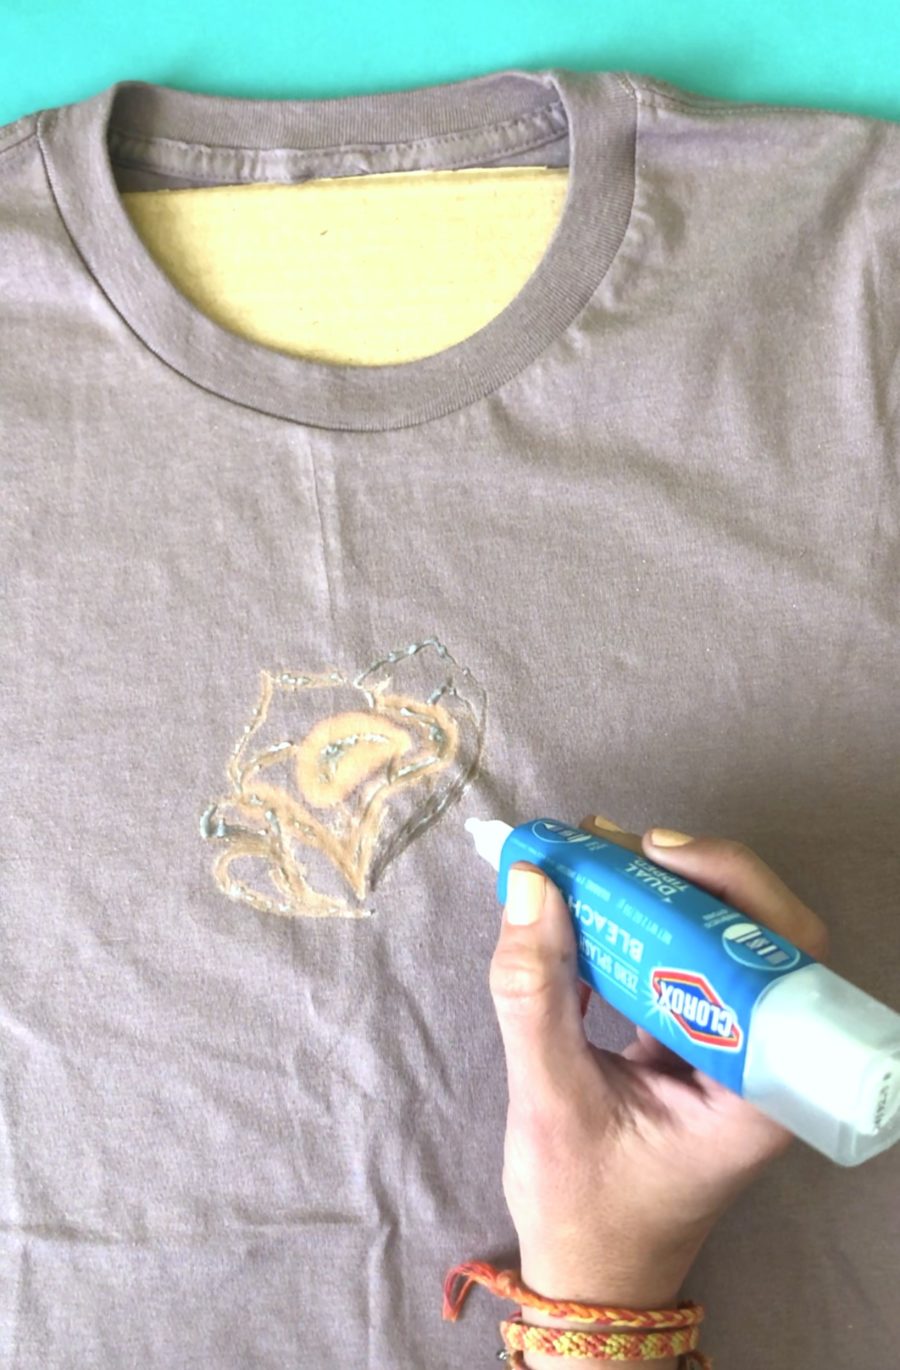
Use the bleach pen to draw flowers, hearts, baseballs, or whatever your imagination can muster on the unbleached part. Leave the bleach to sit for fifteen to thirty minutes and wash out, as you did in step four.
When learning how to tie dye with bleach it is important to work in a safe space and wear gloves. Remember a little bleach goes a long way and leaving it on too long can ruin the fabric. Have fun experimenting with different folding methods, adding color, and creative designs.
Before you start your next bleach tie dye project, make sure you stock up on cotton shirts and hoodies. At AllDayShirts we offer a selection of hoodies and t-shirts in various colors and styles, perfect for individual needs or starting your own business. Order your t-shirts in bulk today!
Please email media@alldayshirts.com
